Choosing Kitchen Wall Cabinets is not merely a style decision. It affects storage, lighting, movement, and daily comfort.
Houzz’s 2024 U.S. Kitchen Trends Study reported that 76% of renovating homeowners upgraded their cabinets. That figure shows how central cabinetry remains in kitchen improvements. The National Kitchen and Bath Association’s 2024 Kitchen Trends Report also highlights storage efficiency, layered lighting, and durable materials as important design priorities. These findings support a practical approach. A beautiful cabinet still fails if its shelves are unreachable or its doors block a work zone.
Kitchen designer Susan Serra, CKD, often expresses the guiding principle this way: “Design the kitchen around the way you live.” That advice sounds simple. It is easy to ignore. Your ceiling height, cooking habits, wall structure, and appliance locations should shape every decision. Measure twice. Then measure again.
This guide presents ten useful tips for selecting Kitchen Wall Cabinets. It considers cabinet height, depth, construction, finishes, hardware, lighting, ventilation, and installation quality. You will see why a few extra centimeters can change clearance near a refrigerator. You will also learn why glossy doors may reflect light beautifully but reveal fingerprints quickly.
There is no perfect cabinet. Even experienced homeowners overlook something. A sample door may look warm in a showroom and appear gray beside your countertop. Therefore, compare physical samples under your kitchen’s actual lighting. Reliable choices come from evidence, careful measurements, and honest compromises.
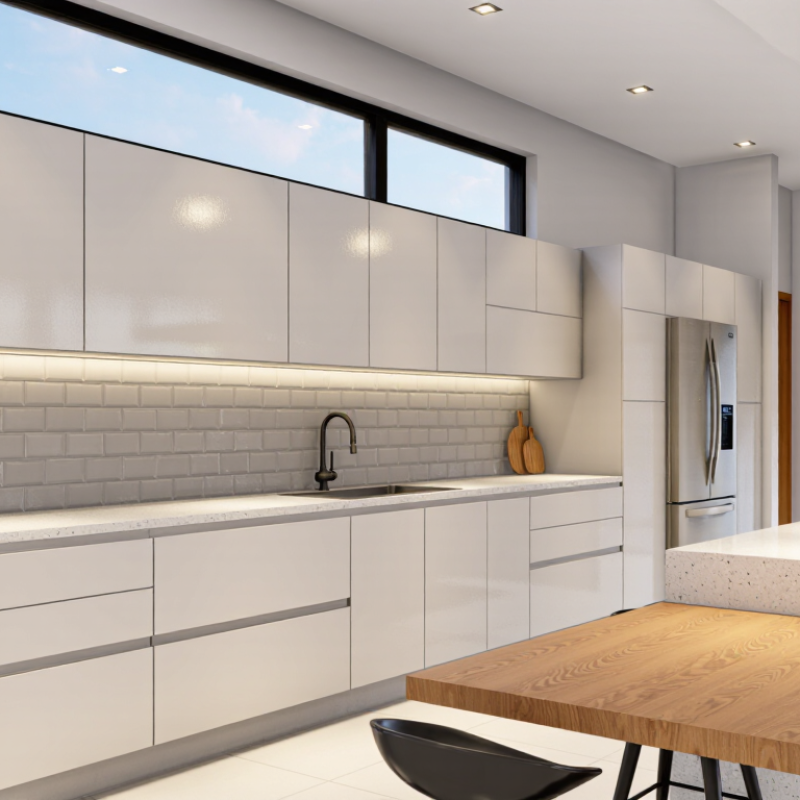
When choosing kitchen wall cabinets, start with the work aisle, not the door style. The NKBA recommends about 42 inches for a one-cook work aisle. This space runs between cabinet fronts and the opposite counter, island, or wall. Mark it on the floor with painter’s tape. Then open the oven and dishwasher. The tape may reveal conflicts that a tidy floor plan hides. This guideline is a planning benchmark, not a rigid legal requirement.
Measure from the deepest fixed projection, including handles and decorative trim. A cabinet door can reduce usable space by several inches when opened. If two people cook together, plan closer to 48 inches where possible. Keep stools, trash bins, and appliance doors outside the main working path. Record measurements in several places because walls are rarely perfectly straight. Small differences can affect cabinet alignment and daily movement.
Do not force every kitchen into one number. A narrow room may need a practical compromise, especially around a refrigerator or corner cabinet. However, reducing the aisle without testing real movement can make the kitchen frustrating. Place cardboard boxes at cabinet depth and walk through the layout. Try carrying a hot pan. It feels awkward, but that is useful information. Recheck the clearance after selecting wall cabinet depths, lighting, and hardware, since each detail can quietly change the working space.
Set Cabinet Dimensions: Allow 18 Inches Above Counters and 12–15-Inch Depth
A practical wall cabinet layout starts with two measurements: height and depth. Leave about 18 inches between the countertop and the cabinet’s lower edge. This clearance gives most users room to prepare food, place small appliances, and clean comfortably. It also reduces the chance of hitting your head while working. Measure from the finished countertop surface, not the unfinished cabinet base. That small detail can change the final result.
Tips
Use a tape measure at several points along the wall. Floors and countertops are rarely perfectly level. Keep wall cabinets between 12 and 15 inches deep. Shallower cabinets improve visibility and movement, while deeper units offer more storage. However, extra depth can make rear items difficult to reach. Place a mixing bowl on the counter during planning. Open the cabinet doors. Check the movement around it.
Experienced installers also inspect outlets, vents, windows, and lighting before fixing cabinet positions. An 18-inch gap may need adjustment near a window trim or tall appliance. Local building requirements can also affect the layout, so confirm them before installation. A careful sketch helps, but it is not enough. Mark the cabinet edges on the wall with painter’s tape. Live with the mock-up briefly. You may discover that the ideal drawing feels cramped in real use. Measure twice. Adjust once.
| Tip | Recommended Dimension | Planning Guidance | Why It Matters |
|---|---|---|---|
| 1 | Allow 18 inches of clearance above standard countertops | Measure from the finished countertop surface to the bottom of the wall cabinet. | This provides practical workspace clearance while keeping commonly used cabinet storage within comfortable reach. |
| 2 | Choose a wall-cabinet depth of 12–15 inches | Use a shallower depth where circulation space is limited; use the deeper end for additional storage. | This range offers useful storage without projecting too far over the countertop or making the work area feel cramped. |
| 3 | Coordinate cabinet width with the wall layout | Common modular widths include 12, 15, 18, 24, 30, 33, and 36 inches, but actual availability varies by cabinet system. | Planning widths around the room's measured sections reduces filler strips, awkward gaps, and unnecessary modifications. |
| 4 | Check ceiling height before selecting cabinet height | Typical wall-cabinet heights include 30, 36, and 42 inches. Select a height that leaves room for installation and trim. | Cabinet height affects storage capacity, visual proportion, and whether the upper cabinets can be installed without interfering with the ceiling. |
| 5 | Maintain appliance-specific clearances | Follow the installation instructions for cooking appliances, ventilation equipment, refrigerators, and other built-in units. | Appliance clearances may differ from general cabinet spacing and are important for safe operation and proper ventilation. |
| 6 | Reserve space for ventilation above cooking areas | Confirm the required distance between the cooking surface and the underside of the hood or microwave before finalizing cabinet placement. | Ventilation equipment often has specific installation requirements that can change the height and arrangement of nearby cabinets. |
| 7 | Use filler panels where walls are not perfectly square | Leave measured adjustment space at corners and next to walls, then cover it with an appropriately sized filler. | Fillers allow doors and drawers to open properly and create a cleaner finished appearance around uneven walls. |
| 8 | Plan corner cabinets before straight wall cabinets | Confirm the corner cabinet's dimensions and door-swing requirements before assigning adjacent cabinet widths. | Corner units determine how much usable wall length remains and help prevent door collisions in adjoining cabinets. |
| 9 | Verify door and drawer clearance | Account for open doors, handles, nearby walls, windows, appliances, and walkways when measuring the layout. | Adequate operating clearance improves accessibility and prevents cabinet hardware from striking nearby surfaces. |
| 10 | Confirm wall strength and fastening locations | Locate wall studs or provide suitable structural blocking before installation; do not rely on drywall alone for heavy cabinets. | Proper support helps keep wall cabinets level and securely attached, especially when they hold dishes, cookware, and other heavy items. |
When choosing kitchen wall cabinets, height should begin with reach, not symmetry. The ADA 2010 Standards set 48 inches as the maximum forward reach for an unobstructed accessible surface (U.S. Access Board, 2010). That rule applies directly to covered accessible facilities, not every private kitchen. Still, it provides a defensible design reference. A shelf, handle, or daily dish above that line may encourage stretching or unsafe stools. Accessibility starts here.
Measure from the finished floor to the highest frequently used item, not merely to the cabinet top. Place mugs, spices, and controls within the user’s comfortable zone. Store heavier cookware lower. The 48-inch limit is not a comfort guarantee. Reach distance, shoulder strength, glare, and door swing also matter. In cabinet mockups, I use cardboard shelves before installation. It looks crude, but it exposes awkward reaches quickly. I once approved a beautiful elevation that placed everyday glasses too high. The drawing was right; the kitchen was wrong.
This approach aligns with broader housing evidence. AARP’s 2021 Home and Community Preferences Survey found that 77% of adults aged 50 and older want to remain in their current home. Adaptable cabinet planning can support that goal as mobility changes. The National Kitchen and Bath Association also identifies ergonomic access as a core kitchen planning concern. Verify local requirements with a qualified professional. Measure seated and standing reach when possible. Record the user’s actual reach before fixing cabinet heights.
ADA reach-range measurements provide a practical reference when positioning cabinet handles, controls, and frequently used storage. Keep essential items within the maximum forward-reach limits shown below.
An unobstructed forward reach may extend from 15 to 48 inches above the finished floor. When a countertop or another obstruction is 20–25 inches deep, the maximum forward reach is 46 inches. Use the lower, more accessible storage zone for everyday items.
When choosing kitchen wall cabinets, inspect construction quality before admiring the finish. KCMA A161.1 certification evaluates structural integrity, door and drawer operation, shelf support, finish resistance, and cabinet loading. Testing is performed through an independent laboratory process, with factory inspections supporting certification reliability. The standard focuses on measurable performance, not appearance alone.
Look for the seal.
The National Kitchen & Bath Association’s 2024 Kitchen Trends Report identifies durability, storage efficiency, and easy maintenance as continuing design priorities. Ask whether the certification covers the exact cabinet line and current construction, not merely the manufacturer’s facility. Check the certificate date, cabinet box material, joinery, back-panel thickness, and wall-mount hardware. A certified cabinet should still receive careful installation; poor anchoring can defeat strong testing results.
On renovation sites, I have seen attractive doors hide weak shelf pins and thin backs. That mistake is easy to miss. Open each door repeatedly. Load a sample shelf with cookware. Examine edge sealing near sinks and corners. KCMA A161.1 certification is useful evidence, but it is not a promise against every installation error or moisture problem. I would also compare the written warranty with the certification scope. Sometimes the paperwork is vague. That deserves a second question.
Plan storage around real weight, not appearance. Plates, glassware, appliances, and canned food can quickly exceed a cabinet’s empty weight. ANSI/KCMA A161.1-2022 includes a 600-pound wall-cabinet loading test, but that result does not guarantee every installation can carry 600 pounds. Cabinet construction, fasteners, wall condition, and loading patterns all matter. Ask for the cabinet’s rated capacity and testing basis. Include shelves, doors, and hardware in your calculation.
Do not guess.
Before drilling, locate every stud and check for wiring or plumbing. A stud finder helps, but confirm locations with small pilot holes. Fasten the mounting rail or cabinet back directly into structural studs. Use appropriately sized structural screws, not ordinary drywall anchors. Two fasteners may look sufficient, yet a narrow cabinet can twist when one door is opened. A temporary ledger board can support the cabinet during installation and reduce strain on the screws.
Keep heavy items low and near the cabinet sides. Avoid storing cast-iron cookware overhead. The U.S. Forest Products Laboratory’s Wood Handbook notes that screw withdrawal strength changes with wood species, density, grain direction, and edge distance. That detail is easy to overlook. I have seen cabinets remain level for months, then sag after repeated door movement exposed weak fastening. Recheck screw tightness, cabinet alignment, and wall movement after loading. When studs are inaccessible, add engineered blocking before drywall installation or consult a qualified installer.
Call us at (516) 858-2492
for a free estimate or simply click the button below: