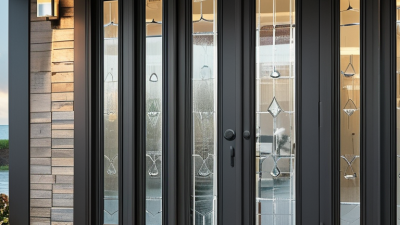
Top 10 Storm Door Installation Tips for Global Buyers
Choosing the right storm door is only half the project. Proper installation protects the entryway, improves ventilation, and helps reduce drafts during severe weather. For global buyers, the process also involves climate, building practices, product dimensions, and regional safety expectations.
Storm Door Installation begins with accurate measurements. Record the opening width at the top, middle, and bottom. Check the frame for rot, twisting, or uneven surfaces. A few millimeters can affect the latch, closer, and weather seal. Coastal homes may need corrosion-resistant aluminum or stainless-steel hardware. Cold regions require durable seals that remain flexible in low temperatures. Hot, humid climates need strong drainage and materials that resist swelling.
Small details matter. Very much. A professional installer should confirm door swing, screen placement, hinge clearance, and threshold height before drilling. Manufacturer instructions remain essential because mounting channels and closer systems vary between models. Local construction requirements should also be reviewed, especially where emergency access, glass safety, or accessibility rules apply. These ten practical tips are designed for buyers, distributors, and installation teams working across different markets.
Some recommendations may need adjustment. A solution that works on a sheltered apartment balcony may fail on an exposed coastal entrance. Even experienced installers occasionally overlook surface alignment or seasonal expansion. That is why careful inspection, suitable tools, and final testing matter. Open and close the door several times. Test the latch, sweep, seals, and hydraulic closer. Reliable results come from measured work, verified components, and a willingness to correct small problems before they become expensive repairs.

Assess Doorway Conditions and Select the Right Storm Door
Before ordering a storm door, inspect the doorway as carefully as the door itself. Measure the width at the top, middle, and bottom. Record the smallest measurement. Then measure height from the sill to the head frame. Use a level to check both side jambs. Small gaps matter.
Look closely at the sill. Rot, loose fasteners, or standing water can prevent a reliable seal. I once treated a slightly twisted frame as acceptable, and the door never closed evenly. That mistake taught me to repair the opening before installation. Check the available clearance for hinges, handles, and nearby walls. The door must swing freely without striking steps or furniture.
Selection should follow local weather and daily use. Coastal or humid buyers should consider corrosion-resistant materials and drainage details. Colder regions may need stronger weather seals and better insulation. In hot climates, a ventilating panel can improve airflow, but it may reduce security when left open. Choose a full-view panel for daylight, or a screened design for regular ventilation. Check the handing and confirm whether the door opens inward or outward. Do not trust appearance alone. Review the installation guide, frame dimensions, included hardware, and adjustment range. If the threshold is uneven, a compatible sill adapter may be necessary. Measure twice. A careful assessment costs less than replacing a poorly fitted door.
Take Accurate Measurements for a Proper Door Fit
Accurate measurements are the foundation of a storm door that closes cleanly and seals against wind. Use a rigid tape measure, not a flexible sewing tape. Measure the doorway width at the top, middle, and bottom. Record the narrowest result. Measure height on the left, center, and right sides. Record the shortest result. Write everything down.
Measure twice. It prevents expensive mistakes.
Check the opening itself, not only the existing door. Remove temporary weather stripping or decorations that may distort your readings. Confirm that the frame is plumb and the threshold is level. A small slope can affect the door’s swing and latch alignment. Measure from the mounting surface to the floor or sill, following the installation guide’s reference points. Keep measurements in both millimeters and inches when working across regions.
I once trusted a single width measurement and missed a six-millimeter difference near the threshold. The door fit, but the latch needed adjustment. That experience changed my process. I now inspect corner joints, trim depth, hinge-side clearance, and nearby walls before ordering. Check whether the door opens outward without striking a step, railing, or light fixture. Also verify that the frame can support the mounting hardware. Do not force a standard size into an uneven opening. A qualified installer can assess unusual masonry, warped frames, or limited clearance before the door is purchased.
Prepare Tools, Hardware, and Installation Materials
Top 10 Storm Door Installation Tips for Global Buyers
A successful storm door installation begins with the correct tools and materials. Measure the opening at the top, middle, and bottom. Record the narrowest width and shortest height. Small differences can affect the fit. Prepare a drill, screwdrivers, a level, measuring tape, pencil, utility knife, and step ladder. Safety glasses and work gloves are useful, especially when cutting or drilling.
Tips:
Check the supplied hardware before opening the door. You may need corrosion-resistant screws, shims, mounting brackets, washers, and suitable exterior sealant. Hardware sizes can vary by door thickness and frame material. Wood, metal, and masonry surfaces may require different anchors. Do not assume the included screws match every building condition. I have seen poor alignment caused by one missing spacer.
Keep the installation area dry and clear. Store the door flat, protected from direct sunlight, until assembly begins. Confirm that hinges, handles, closers, sweep seals, and weatherstripping are present. A level helps prevent rubbing and uneven gaps. Leave enough clearance for seasonal movement, especially in humid or cold regions. The manufacturer’s instructions should guide screw placement and sealant use. If a measurement seems inconsistent, stop and check it again. Guessing here often creates extra drilling, damaged surfaces, and weaker weather protection.
Install the Storm Door Frame and Operating Hardware
Top 10 Storm Door Installation Tips for Global Buyers
A secure storm door begins with a carefully prepared frame. Measure the opening at the top, middle, and bottom. Small differences can affect the fit. Check that the mounting surface is flat, dry, and free from loose paint. Use a level on both side jambs before tightening any screws. A slightly tilted frame may cause rubbing, weak seals, or difficult closing.
Install the frame without forcing it into place. Leave the manufacturer’s recommended clearance for seasonal movement and drainage. Choose corrosion-resistant fasteners suited to your wall material, especially in coastal or humid regions. Tighten screws gradually from top to bottom. Over-tightening can twist the frame, although this mistake is easy to miss. Experienced installers often recheck the level after every adjustment.
Tips: Test the door before adding the operating hardware. Confirm that the hinges move freely and the latch meets the strike plate cleanly. Position the closer where the door opens safely without hitting nearby walls or furniture. Adjust its speed slowly; a door that slams may damage hardware, while one that closes too slowly may remain unsecured. Keep the handle at a comfortable height. Check the sweep against the threshold, but do not compress it excessively. Work carefully. My own installations have taught me that one final opening test often reveals problems measurements alone cannot show.
Test Performance and Maintain the Door for Long-Term Use
A storm door should be tested before harsh weather arrives. Close it slowly and check whether the latch engages without force. Inspect the gap around the frame. Daylight or moving air can reveal poor alignment. On a windy day, listen for rattling near the hinges and handle. Small movement matters.
Test the weather seal with a gentle water spray, not a pressure washer. Water should run away from the frame, not collect at the threshold. Check the screen, glass panel, closer, and safety chain for secure attachment. In coastal or humid regions, inspect screws for early corrosion. Cold climates need special attention to brittle seals and frozen hardware. I once trusted a tight-looking door that leaked at one lower corner. The mistake was easy to miss.
Maintenance should follow the local climate and household use. Clean tracks and drainage holes every few months. Tighten loose fasteners, but avoid stripping the frame. Apply a suitable lubricant to hinges and moving latch parts. Replace cracked seals before they shrink further. Keep the closer adjusted so the door shuts firmly without slamming. A simple paper test helps: place paper between the seal and frame, then close the door. If the paper slides out easily, sealing pressure is probably weak. Check again after major temperature changes. Weather can expose flaws that a visual inspection misses.
Top 10 Storm Door Installation Tips for Global Buyers
Recommended inspection and maintenance intervals help preserve weather resistance, safe operation, and long-term door performance. Always follow local building requirements and the door manufacturer's instructions.
The schedule uses practical maintenance intervals commonly applied to exterior doors: drainage paths should be checked monthly, while hardware, seals, fasteners, and closer settings should generally be reviewed every three to six months or after severe weather.